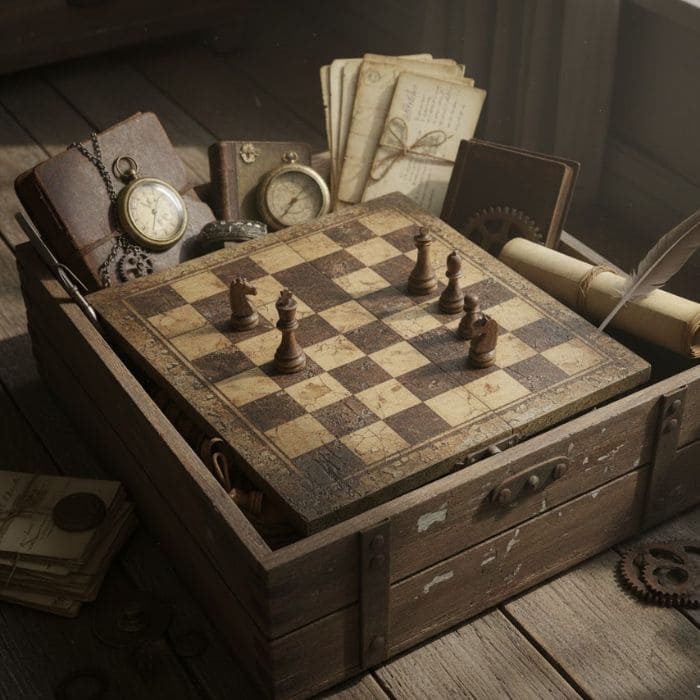
There are certain objects in a home that follow you quietly for years, never demanding attention, never asking to be used, and the chess board I turned into a wall rack is one of those objects.
I honestly cannot remember when or where I got it anymore.
It might have been a gift, it might have been something I picked up casually a long time ago, but what I do remember clearly is how often it moved with me, from shelf to shelf, from one corner to another, always in good condition, always waiting, even though I was never truly interested in playing board games.
The board itself was solid and well made, with a satisfying weight and clean edges, the kind of object that feels wrong to throw away but also feels slightly guilty to keep unused.
For years, it leaned against walls or lived in closets, surviving moves and life changes without ever finding a role that matched how I actually live now.
I Decided It Deserved a Second Life
I think many of us own things that are still good but no longer belong to the version of life we are living, and selling them often feels disappointing because their resale value rarely reflects their quality.
I knew I could sell the chess board, but the idea of letting it go for very little money felt wrong, especially when the wood was still beautiful and sturdy.
What I do need, constantly, is more functional storage, more places to hang jackets, bags, keys, and the everyday items that otherwise end up piled on chairs.
Why I Repainted It Before Doing Anything Else
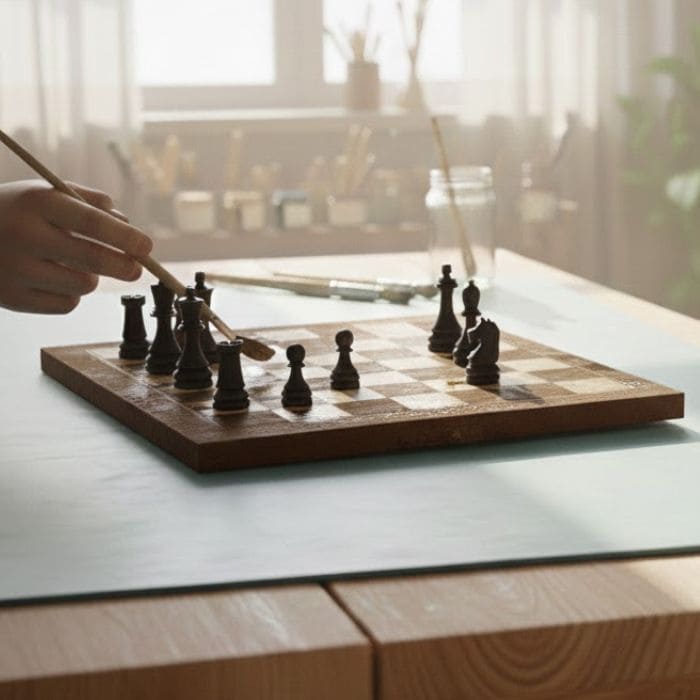
Before attaching anything, I knew the board needed a visual reset. The original contrast felt too sharp for my bedroom, where I prefer calmer, warmer tones that do not compete with the rest of the space.
I chose a combination of deep brown and softened cream, colors that feel grounded, slightly vintage, and easy to live with day after day.
Darker tones also age more gracefully, which mattered to me because this piece would be touched constantly.
Jackets brushing against it, keys swinging, bags being lifted on and off, all of that leaves traces, and I wanted a finish that would absorb use rather than show wear harshly.
I lightly sanded the surface first, just enough to help the paint grip, then applied two thin coats, allowing proper drying time in between.
Once finished, I let the board rest overnight so the paint could fully settle, not just dry on the surface.
What I Prepared Before Assembling Everything
For materials, I kept things simple but reliable. I used a strong wood adhesive, the kind designed to hold weight long term, because the chess pieces would eventually support coats and bags.
I also prepared a drill, screws for mounting, and a few nails, although screws are always my preference for anything that will be used daily.
I kept a ruler, pencil, and clean cloth nearby, because spacing and alignment make the difference between something that looks intentional and something that feels improvised.
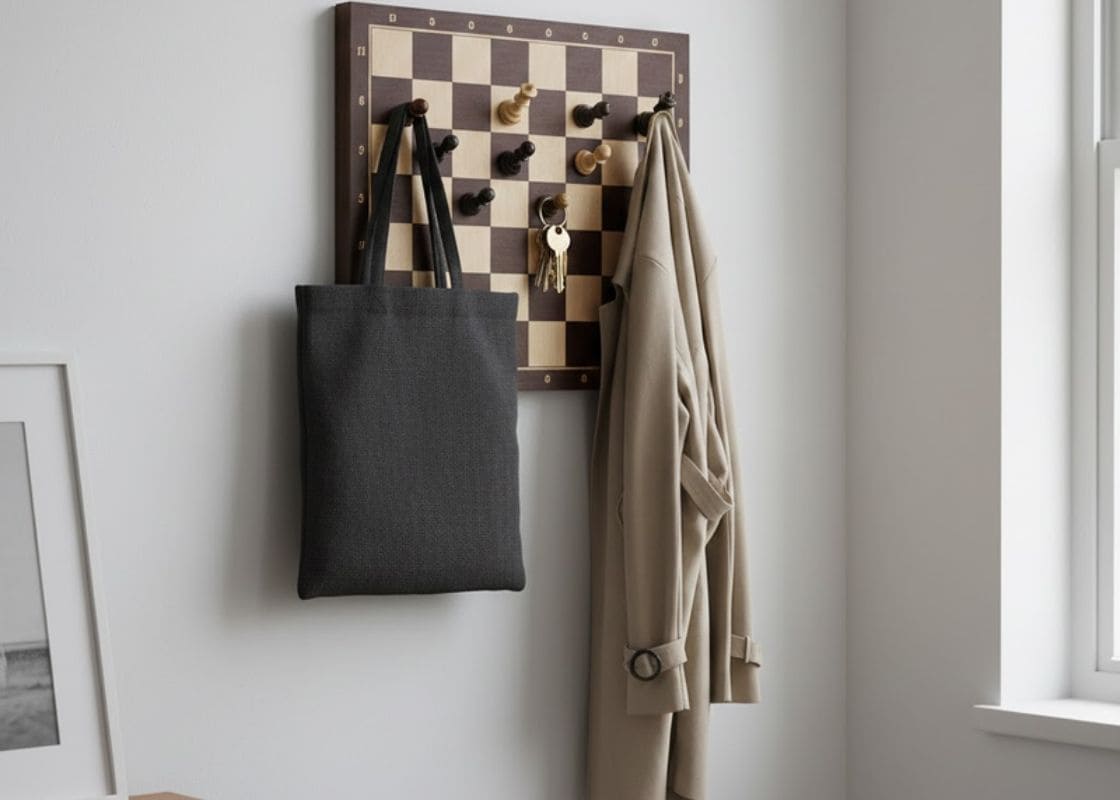
Choosing Which Chess Pieces Would Become Hooks
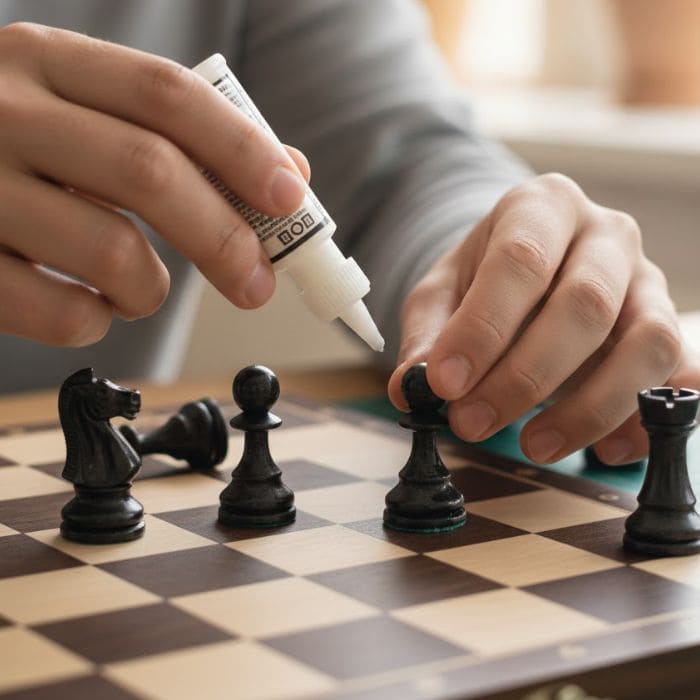
This part took more thought than I expected. I did not use every chess piece I owned. Instead, I selected them based on shape and strength.
Pawns, rooks, and knights worked especially well because their forms naturally catch fabric without sharp edges that could damage clothing.
I also liked the idea that different pieces would hold different things, heavier coats on sturdier shapes, lighter items on smaller ones, creating a quiet logic that made sense to me even if no one else ever noticed it.
Before gluing anything, I arranged the pieces on the board and lived with the layout for a full day, walking past it, adjusting spacing, and making sure it felt balanced rather than crowded.
Gluing the Pieces and Letting Time Work
When I was ready, I applied glue carefully to the base of each chess piece and pressed it firmly onto the board, holding it in place for about thirty to sixty seconds before moving on.
I worked slowly, one piece at a time, because alignment is what keeps this from looking chaotic.
After all the pieces were attached, I left the board completely untouched for at least twenty-four hours, even though the glue claimed to set faster. From experience, I have learned that weight-bearing projects always benefit from patience.
Mounting the Board Securely on the Wall
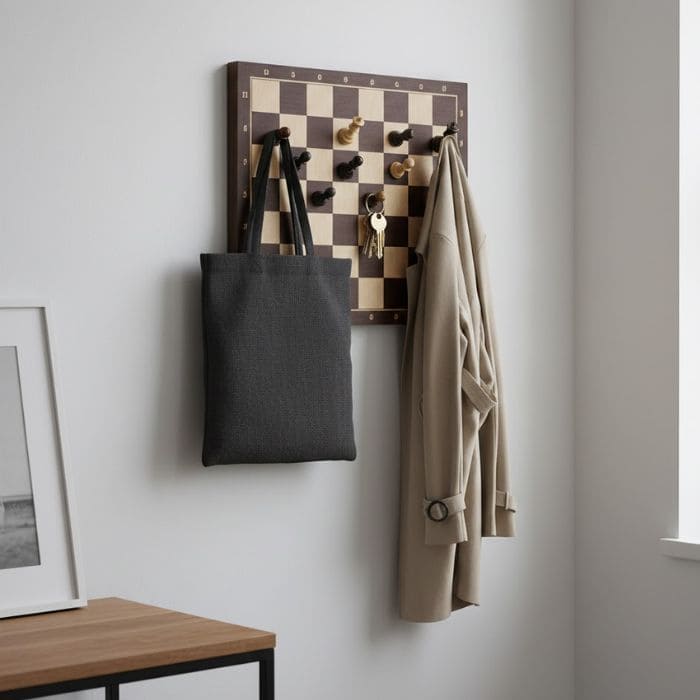
Once everything had cured fully, I drilled through the board at sturdy points near the corners and mounted it using screws anchored into wall studs. This step is essential if you plan to hang real weight, and I did not want this piece to be decorative only.
I installed it at a height that felt natural for daily use, high enough that coats would hang freely, but low enough that grabbing keys would never feel like a stretch.
The moment it was secured, the chess board felt completely transformed, no longer a game waiting to be played, but a useful, grounded presence in my bedroom.
Now, I use this rack constantly. Jackets, keys, small bags, and even the occasional scarf find their place there, and every time I reach for something, I feel a small sense of satisfaction knowing that an object I once ignored has become genuinely useful.