Yesterday afternoon, I stopped by a small home and gift shop near my house, one of those places you do not necessarily plan to visit but somehow always end up wandering into because the windows are filled with soft light and tiny decorative details that feel inviting rather than overwhelming.
The shop is not large, but it is carefully arranged, shelves stacked with ceramic bowls, linen napkins, simple ornaments, and small seasonal items that feel thoughtful without being expensive, which is exactly the kind of place I enjoy browsing when I want inspiration without pressure.
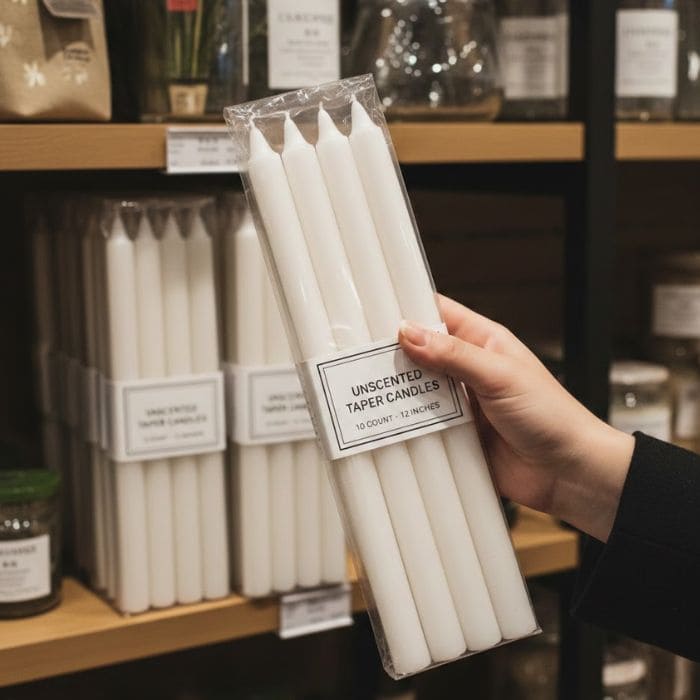
I told myself I was only going in to look, which is usually how these things begin, but after walking slowly through the aisles and touching far more objects than I needed to, I noticed a basket of plain taper candles near the counter.
They were simple, unscented, and clearly meant to be used rather than admired, and that simplicity immediately caught my attention.
The Candles I Chose and Why They Felt Right
I picked up a single packet of four taper candles, each 12 inches tall, clean white, and completely unscented, which mattered to me because I wanted them to work with food, conversation, and quiet evenings rather than compete with them.
They were budget-friendly too, the kind of purchase that does not require justification, and as I held them in my hands, I already knew I did not want to leave them plain.
There was something about their length and simplicity that made them feel like a blank page, and by the time I paid and walked back home, the idea had already started forming.
Once I brought the candles home and laid them out on my table, I realized how rarely we personalize things that are meant to be used and burned, even though those objects often become part of our most meaningful moments.
Candles show up during holidays, dinners, quiet nights, and celebrations, and yet they are usually left untouched, decorative but anonymous.
I wanted these candles to carry a little bit of story before they ever met a flame.
The Paint I Used and What Actually Works on Candles
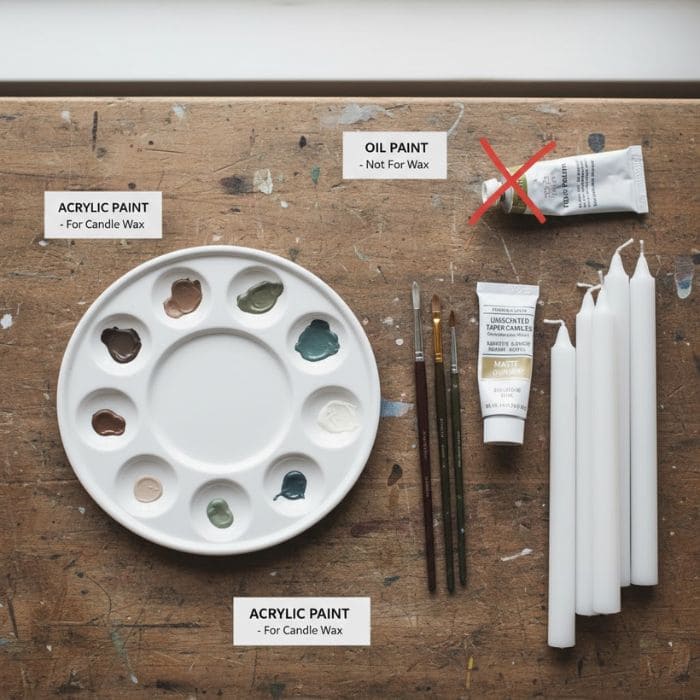
For painting, I used acrylic paint, which works well on candle wax as long as it is applied in thin layers and allowed to dry completely, and I chose only a small palette of colors, soft browns, greens, reds, muted blues, and warm whites, because I wanted the designs to feel calm and cohesive rather than busy.
I avoided heavy, glossy paint and anything oil-based, because those never dry properly on wax and can crack or smear when handled.
A set of fine-tip paintbrushes made the biggest difference here, especially for small details, because thick brushes tend to drag across the surface and disturb the wax.
The Designs I Chose and How I Planned Them
Before painting anything directly onto the candles, I spent a few minutes sketching ideas on paper, not full designs, just tiny reminders of scale and spacing.
I kept everything small and simple, little gingerbread men, miniature Christmas trees, snowmen, tiny cars carrying trees on their roofs, and scattered snowflakes, because large designs tend to warp visually once the candle starts to burn.
I decided to leave plenty of empty space between drawings, allowing each candle to feel intentional without looking crowded, and I also made sure that no design wrapped completely around the candle, which helps keep the burning even later on.

I painted the candles one at a time, rotating each one gently as I worked rather than laying them flat, because touching wet paint on wax is the fastest way to ruin your own patience.
Each small illustration took only a few minutes, but I gave myself plenty of pauses in between, allowing the paint to set slightly before adding any extra detail.
I learned quickly that lighter pressure works better than trying to make lines bold, because thin paint bonds more cleanly to wax and dries without cracking.
If a line did not come out the way I wanted, I simply wiped it gently with a soft cloth while it was still wet and tried again, which felt forgiving rather than frustrating.
Drying Them Without Damaging the Paint
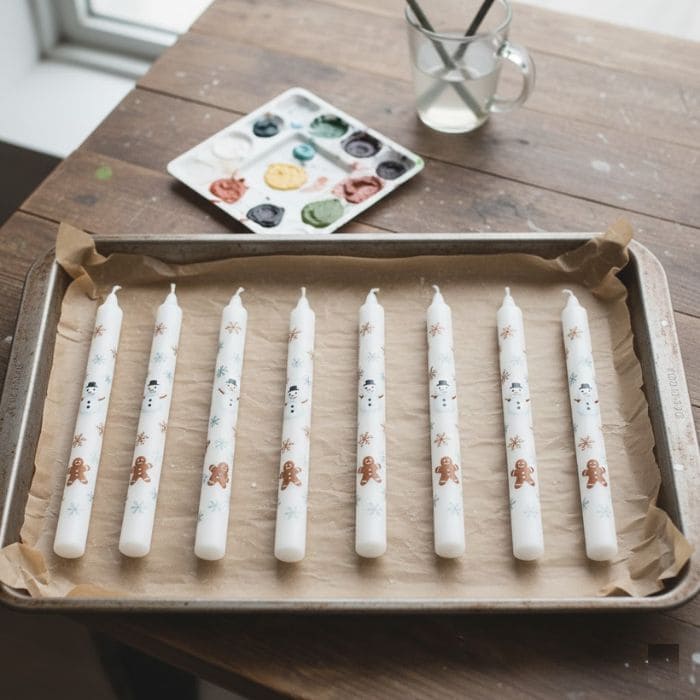
Once all ten candles were painted, I stood them upright on a baking tray lined with parchment paper, spacing them apart so air could circulate freely.
I left them to dry for at least two hours, untouched, in a cool room away from direct sunlight, because heat can soften wax and cause painted details to slide or blur.
After the first drying period, I lightly touched one candle to test it, and when the paint felt fully set, I left them for another hour just to be safe.
Rushing this step is tempting, but it is also how fingerprints and smudges happen, and patience here makes a visible difference.
How I Plan to Use Them During the Holiday
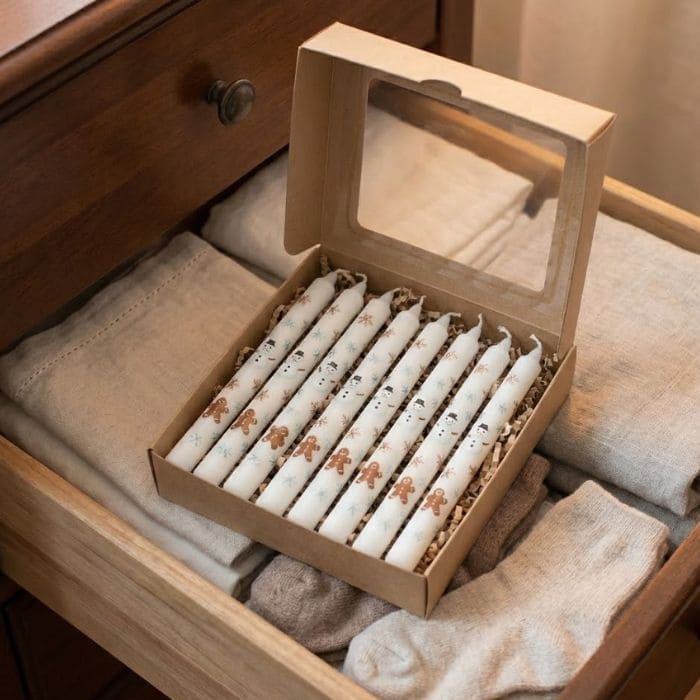
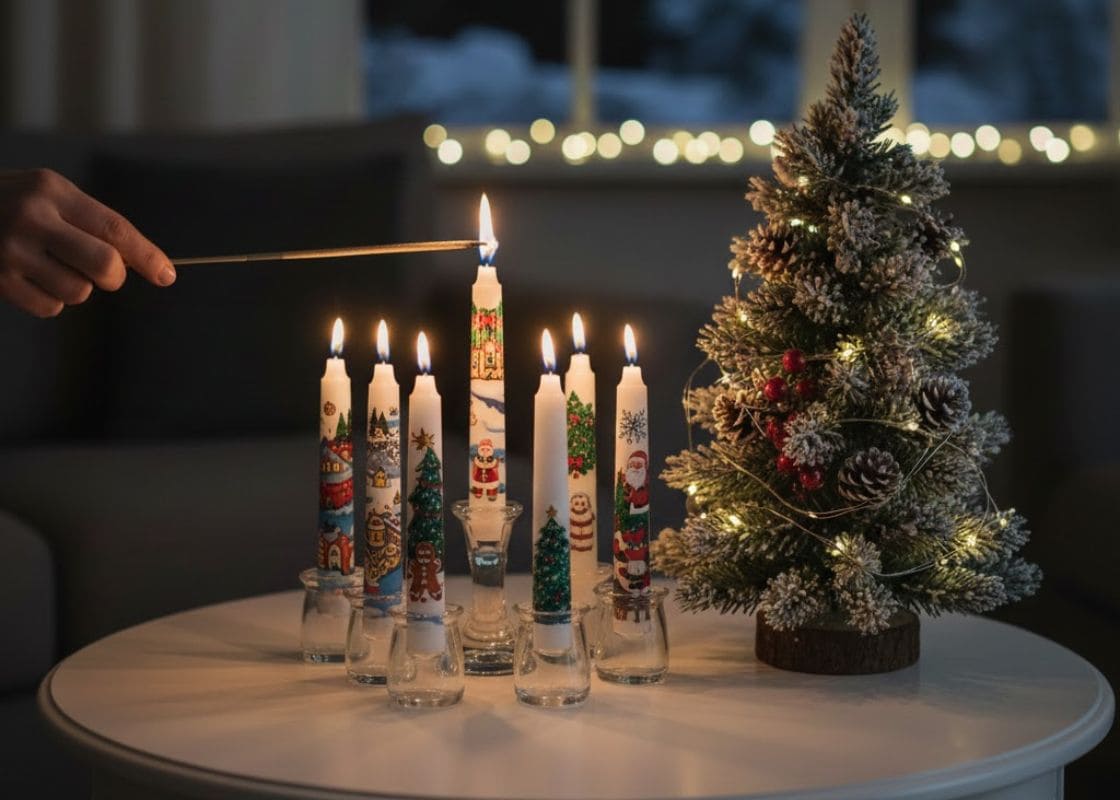
Now the candles are resting in a simple box, ready for the holiday, and every time I peek inside, I feel a quiet excitement, because I already know how they will look once lit.
The small drawings will soften in the glow, details becoming gentler as the wax warms, and that transformation feels like part of the charm rather than something to avoid.
I plan to place them along the dining table, mixing them with greenery and simple holders, and I love the idea that each candle will burn down slowly, carrying its tiny illustrations through the evening.