December arrives differently for me than it used to. I no longer feel the need to decorate every surface or fill the house with noise and color just because the season tells me to.
Some years, December feels heavy. The news feels loud and the world feels uncertain. And yet, this season still carries a quiet promise, the idea that something gentle and hopeful is approaching, one day at a time.
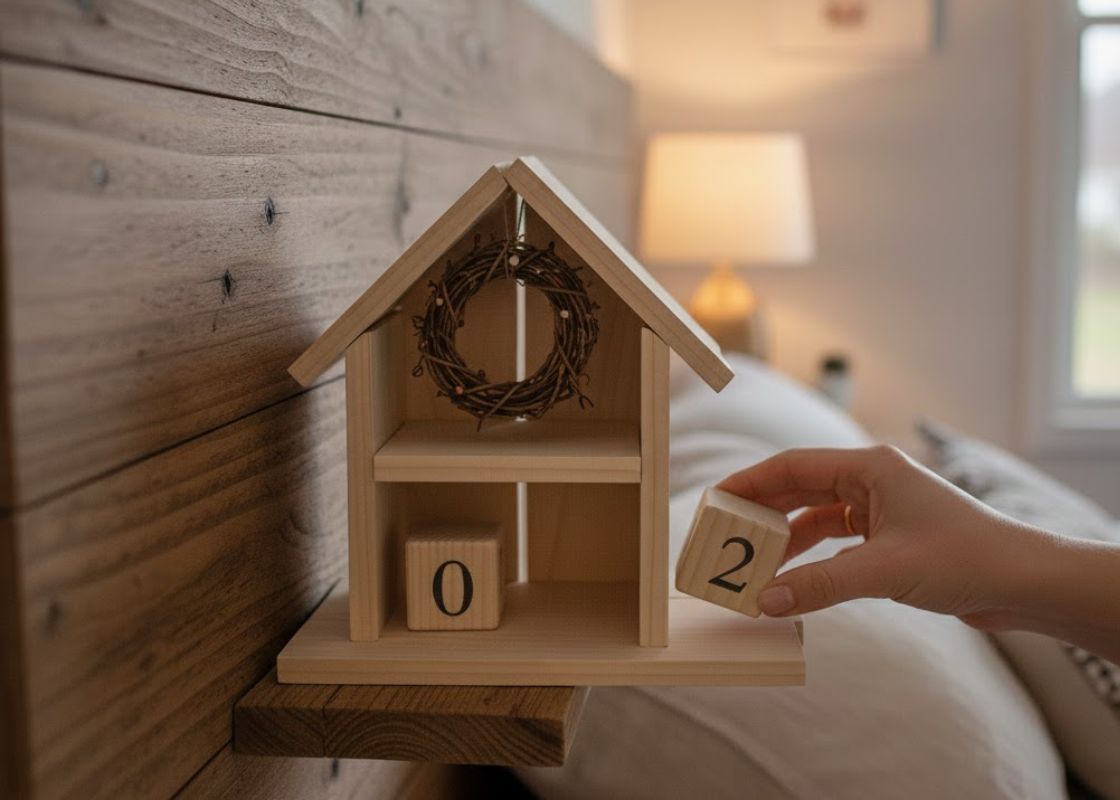
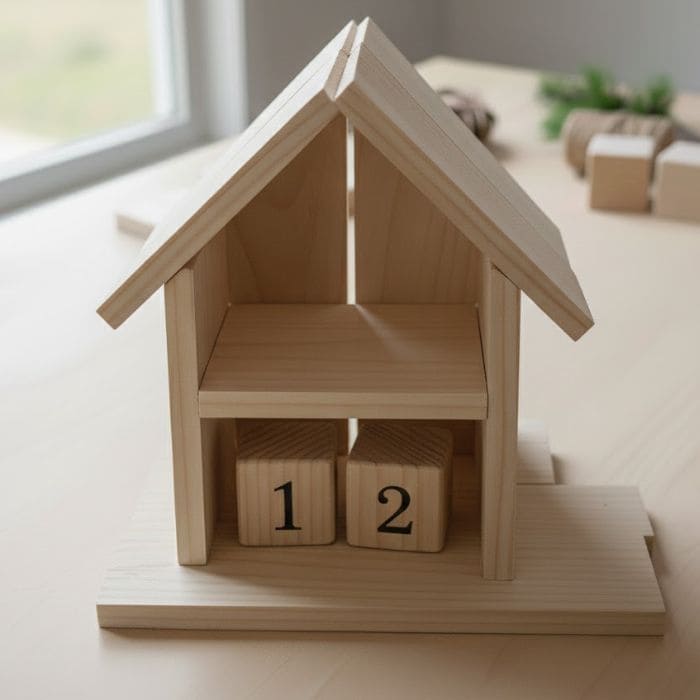
That is why, every December, I choose to make at least one thing by hand. This year, that one thing is a simple Christmas countdown calendar, made of wood, shaped like a house.
Why I Chose a Simple Wooden House Shape This Year
The idea of a house felt especially meaningful to me as I planned this project. In 2025, many people are speaking about it as a Year of Hope, particularly because it is a Catholic Jubilee Year with the theme “Pilgrims of Hope.”
It is a year that invites reflection, spiritual renewal, and new beginnings, while acknowledging the challenges the world is facing, from war to climate change, to uncertainty in everyday life.
When I thought about that theme, the image that stayed with me was not grand or symbolic in a dramatic way. It was simple – a house, a place of shelter, and a place where light stays on even when the world feels unsteady.
That is why I did not want a flashy calendar or something playful. I wanted something grounded. A house-shaped countdown felt like a quiet reminder that hope often lives in ordinary places, in daily rituals, in small moments we return to again and again.
Materials I Used (With Real Sizes and Details)
Wood (light pine works well):
- 2 vertical side pieces: 10 inches tall × 1.5 inches wide × ¾ inch thick
- 1 bottom base piece: 8 inches wide × 2 inches deep × ¾ inch thick
- 2 roof pieces: 7 inches long × 1.5 inches wide × ¾ inch thick, cut with matching angles
- 1 back panel (optional but recommended): 8 inches wide × 9 inches tall, thin plywood
- 1 interior shelf strip for blocks: 8 inches wide × 1 inch deep × ¾ inch thick
Calendar blocks:
2 wooden cubes: 2 × 2 × 2 inches
Decor:
- 1 small grapevine wreath, about 4 inches in diameter
- Faux pine or cedar sprig
- Natural twine or string
Tools and supplies:
- Wood glue
- Small finishing nails or brad nails
- Hammer or nail gun
- Measuring tape and pencil
- Sandpaper (medium and fine grit)
- Acrylic paint or wood stain (neutral tones)
- Paint marker or stencils for numbers
Step 1: Building the Base and Walls With Patience
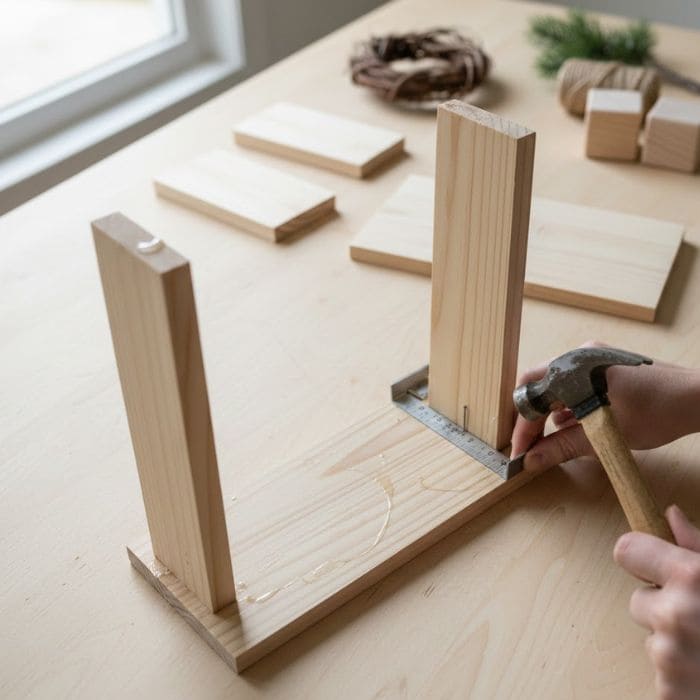
I began by attaching the two vertical side pieces to the base. I applied wood glue first, then secured them with finishing nails, making sure everything stayed square.
This step sets the tone for the entire project. If the base is rushed or uneven, the house will always feel slightly off.
I paused often, checking alignment from different angles. This is not about speed. It is about letting the structure feel stable before moving on.
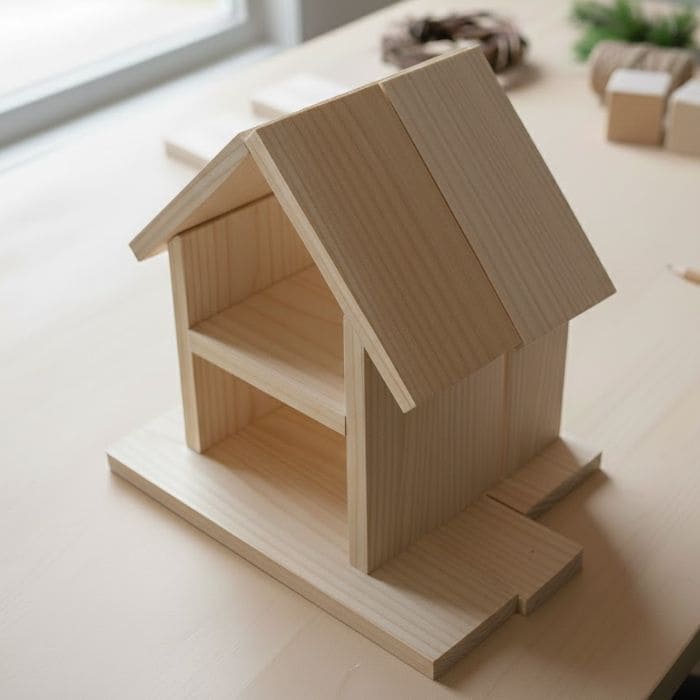
Step 2: Shaping and Attaching the Roof

The roof pieces were cut at matching angles so they met neatly at the top. I dry-fitted them first, holding them in place without glue to make sure the angle felt right visually.
Once I was happy, I glued and nailed them carefully, starting at the peak and working outward.
The roof is what gives the house its character. I did not aim for perfection. A slightly handmade look felt right, especially for a piece meant to be touched daily.
Step 3: Adding the Back Panel for Strength and Calm
Although optional, I strongly recommend adding a back panel. It gives the piece weight, stability, and a finished feel. I glued it in place and pressed gently until it settled.
This also creates a clean interior surface, which helps visually frame the wreath later.
Step 4: Installing the Shelf for the Countdown Blocks
Inside the house, I measured about 2 inches up from the base and installed a narrow shelf. This shelf needs to be deep enough to hold the blocks securely, but shallow enough to keep them visible.
I tested the shelf height several times with the blocks before fixing it in place.
This step matters more than it seems. When the blocks fit comfortably, using the calendar feels effortless rather than fiddly.
Step 5: Sanding Everything Until It Feels Gentle
Before painting or decorating, I sanded every edge lightly.
Sharp corners catch the eye and the hand in an unpleasant way. Softened edges make the piece feel calm and inviting.
I wiped away all dust and let the wood sit for a while. Rushing from sanding to painting often traps dust and roughness you notice later.
Step 6: Painting and Finishing With Intention
I chose a very light, warm neutral for the house, something between natural wood and soft white. I wanted it to feel peaceful, not festive in a loud way.
The blocks were painted slightly darker so the numbers would stand out.
I hand-painted the numbers using a paint marker, accepting small imperfections. Those slight variations remind me this was made by hand, not produced.
Step 7: Decorating the Inside of the House
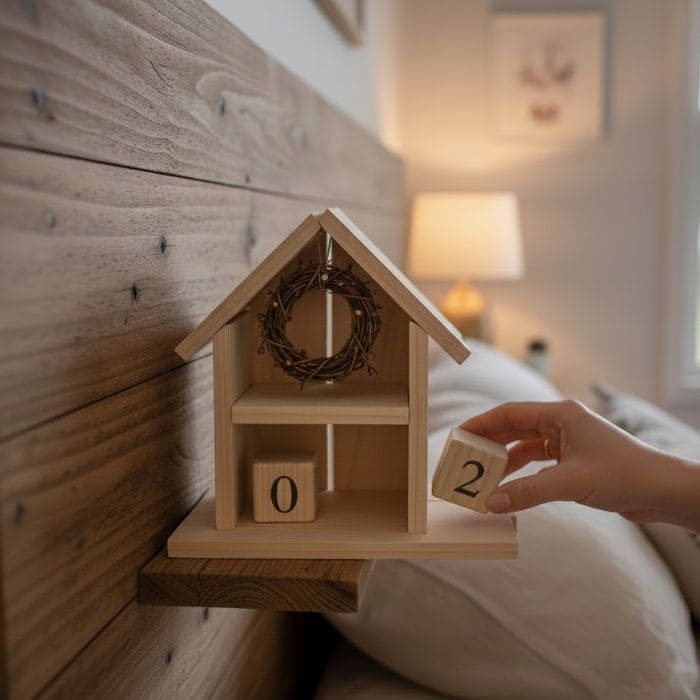
I tied a loop of twine and hung the grapevine wreath inside the house. I added a small piece of faux greenery at the bottom, just enough to suggest winter without overwhelming the space.
Once December begins, I place the blocks on the shelf and change them each morning. It takes only a moment, but it slows me down. It reminds me that hope does not arrive all at once. It comes day by day.